Creative IoT Projects for 5th to 7th Grade Students
- Prabahar K
- Jul 22
- 9 min read

A good IoT project should make a student say, “Wait, I built something that can sense the real world?” That moment matters. It turns coding, circuits, and science from textbook ideas into something visible, useful, and fun.
IoT, or the Internet of Things, simply means connecting everyday objects to the internet or to another device so they can send data, receive instructions, or react automatically. For 5th to 7th grade students, the best projects are simple, safe, low-voltage, and hands-on. They should use real sensors, show clear results, and leave room for creativity.
The projects below work well for school clubs, STEM labs, science exhibitions, home learning, and maker sessions. Most can be built using beginner-friendly boards such as micro:bit, Arduino with Wi-Fi modules, ESP8266, ESP32, or similar kits. Adult supervision is recommended, especially when using tools, batteries, water, or soldering equipment.
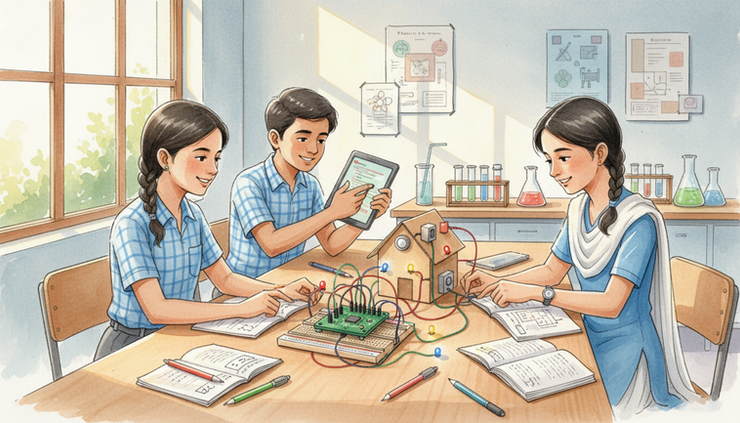
What makes an IoT project right for grades 5 to 7
Students in these grades can understand patterns, cause and effect, basic measurement, and simple logic. That makes them ready for IoT, as long as the project is not overloaded with complex coding.
A good project for this age group should have:
A clear real-world purpose
For example, saving water, checking room temperature, or reminding someone to care for a plant.
One or two main sensors
Too many sensors can make the project confusing. Start small.
Visible output
LEDs, buzzers, phone notifications, graphs, or dashboard readings help students see what is happening.
Safe hardware
Use low-voltage battery packs, USB power, and ready-made modules. Avoid mains electricity.
Room for decoration
Cardboard houses, paper gardens, model roads, and recycled materials make the project feel personal.
Here is a quick comparison before choosing a project.
Project | Main sensor or part | Best for | Difficulty |
Smart plant reminder | Soil moisture sensor | Environmental science | Easy |
Weather station | Temperature and humidity sensor | Data collection | Easy to medium |
Smart dustbin | Ultrasonic sensor | Cleanliness awareness | Medium |
Classroom noise monitor | Sound sensor | Behaviour and sound study | Easy |
Water level alert | Water level sensor | Home safety | Easy |
Smart door alert | Magnetic switch or IR sensor | Security basics | Easy |
Air quality indicator | Gas or air sensor | Pollution awareness | Medium |
Smart street light model | LDR sensor | Energy saving | Easy |
Pet feeder reminder | Timer and buzzer | Automation basics | Medium |
Attendance counter model | RFID or button input | Data logging | Medium |
1. Smart plant watering reminder
This is one of the most popular beginner projects because students can connect it to something living. A soil moisture sensor checks whether the soil is dry. If the plant needs water, an LED turns on, a buzzer beeps, or a message appears on a simple app dashboard.
Students learn how sensors measure conditions and how a device can make decisions using `if` and `else` logic.
What students build
A small smart pot that detects dry soil and sends a watering reminder.
Useful parts
Soil moisture sensor
ESP8266, ESP32, Arduino, or micro:bit with suitable extension
LED or buzzer
Small plant pot
Jumper wires
Battery pack or USB power
Creative twist
Let students decorate the plant pot and name their device. They can also compare different soils, such as garden soil, cocopeat, and sand, to see how moisture readings change.
Safety note
Keep water away from the main board. Place the sensor in soil, but keep electronics raised and dry.
2. Mini weather station
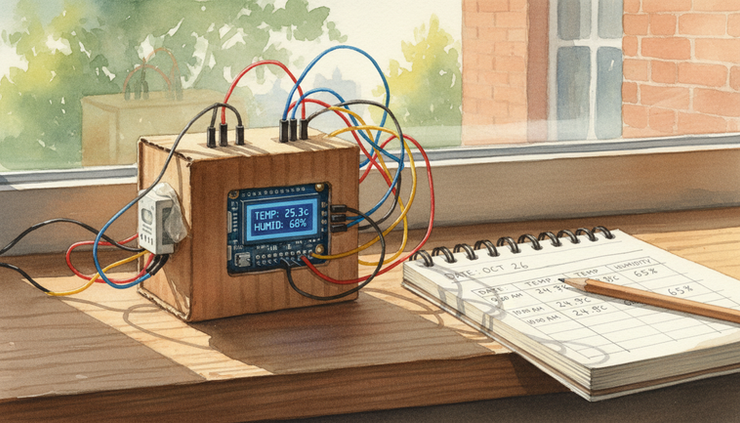
A mini weather station helps students collect temperature and humidity data. It can show readings on a small display or send them to a phone or web dashboard.
This project connects science, maths, and coding. Students can record readings in the morning, afternoon, and evening, then look for patterns.
What students build
A small device that measures temperature and humidity in a room, balcony, or school garden.
Useful parts
Temperature and humidity sensor
ESP32, ESP8266, or Arduino with Wi-Fi support
OLED display or LCD screen
Breadboard and jumper wires
Cardboard case
What it teaches
Students learn about weather data, units of measurement, and why readings vary based on sunlight, shade, fans, and open windows.
Creative twist
Create a hand-drawn “weather dashboard” beside the electronic display. Students can update it daily and compare human observation with sensor data.
3. Smart dustbin that detects fullness
A smart dustbin project uses an ultrasonic sensor to measure how full a bin is. The sensor sends out sound waves and checks how far away the waste is. When the bin is nearly full, an LED glows or a notification is sent.
This project is great for school exhibitions because it connects technology with cleanliness and public responsibility.
What students build
A model dustbin that alerts users when it needs to be emptied.
Useful parts
Ultrasonic distance sensor
ESP8266, ESP32, or Arduino
LED lights
Buzzer
Small bin or cardboard model
Optional display
What it teaches
Students learn distance measurement, thresholds, and the idea of smart city systems.
Creative twist
Build a small “smart school” model with two bins, one for dry waste and one for wet waste. Students can compare which fills faster during a mock activity.
4. Classroom noise monitor
A classroom noise monitor uses a sound sensor to detect noise levels. If the room becomes too loud, a red LED turns on. When the sound level is moderate, a yellow LED glows. When the room is quiet, a green LED stays on.
This project should be framed carefully. It is not about scolding students. It is about understanding sound levels and self-awareness.
What students build
A simple traffic-light style noise indicator for a study space.
Useful parts
Sound sensor
Microcontroller board
Red, yellow, and green LEDs
Resistors
Cardboard stand
What it teaches
Students learn about input values, ranges, and visual feedback.
Creative twist
Let students create custom sound zones such as “reading mode”, “group work mode”, and “play break mode”. They can adjust the limit for each mode.
5. Water tank level alert
Many Indian homes use overhead water tanks, making this project easy to understand. A water level alert model shows when water is low, medium, or full. It can use a water level sensor or simple safe probes in a model tank.
What students build
A small tank model that shows water level using LEDs or sends an alert.
Useful parts
Water level sensor
ESP32, ESP8266, or Arduino
LEDs or buzzer
Small transparent container
Jumper wires
USB power
What it teaches
Students learn about water conservation, measurement, and alert systems.
Creative twist
Students can build a cardboard house with a transparent tank on top. The circuit becomes part of the house model.
Safety note
Use only low-voltage circuits. Do not connect the project to real pumps, taps, or home wiring.
6. Smart door alert
A smart door alert detects when a door, cupboard, or model gate opens. It can use a magnetic reed switch, IR sensor, or simple push button. When the door opens, the system makes a sound or sends a message.
This is a good project for explaining basic security systems in a safe and simple way.
What students build
A model door that sends an alert when opened.
Useful parts
Magnetic reed switch or IR sensor
Microcontroller board
Buzzer
LED
Cardboard door model
Optional phone dashboard
What it teaches
Students understand digital input, open and closed states, and event-based coding.
Creative twist
Turn it into a “smart library cupboard” that alerts when a book cabinet is opened. Students can add labels and a small log sheet.

7. Air quality indicator
An air quality indicator uses a gas or air sensor to detect changes in the surrounding air. For school-level projects, the focus should stay on awareness, not scientific accuracy. Low-cost sensors can show changes, but they should not be treated as professional pollution measuring devices.
What students build
A traffic-light style indicator that changes colour when air readings change.
Useful parts
Air quality or gas sensor module
ESP32, ESP8266, or Arduino
RGB LED or three LEDs
Small display
Cardboard enclosure
What it teaches
Students learn that air quality can change due to dust, smoke, room ventilation, and other factors.
Creative twist
Students can compare readings near a window, near a plant, and in a closed room. They should record observations and discuss possible reasons.
Safety note
Do not test sensors using harmful smoke, chemicals, fire, or sprays. Keep experiments safe and supervised.
8. Smart street light model
This project uses an LDR, or light dependent resistor, to detect darkness. When the surroundings become dark, the street light turns on. When there is enough light, it turns off.
It is simple, visual, and perfect for connecting IoT with energy saving.
What students build
A model street with lights that turn on automatically at night.
Useful parts
LDR sensor
LED lights
Microcontroller board
Resistors
Cardboard road and houses
Optional Wi-Fi dashboard
What it teaches
Students learn about light sensing, automation, and energy use.
Creative twist
Build a mini neighbourhood with trees, roads, houses, and signboards. Students can test the model by covering the sensor with their hand.
9. Pet feeder reminder
This project does not need to dispense food automatically. For grades 5 to 7, a safer version is a reminder system. It uses a timer, button, or simple app input to remind a student when it is time to feed a pet.
What students build
A reminder box that lights up or beeps at feeding time.
Useful parts
Microcontroller board
Buzzer
LED
Push button
Optional real-time clock module
Small cardboard pet bowl model
What it teaches
Students learn scheduling, reminders, and user interaction.
Creative twist
Students can design the reminder for a dog, cat, fish, or bird. They can include a “fed” button that turns off the alert.
10. Simple attendance counter model
An attendance counter can be made with RFID cards, push buttons, or QR-style ideas depending on the kit available. RFID may be slightly more advanced, but it excites students because it feels close to real systems used in libraries, schools, and transport cards.
What students build
A model system that counts entries and shows the total on a display.
Useful parts
RFID reader and cards, or push buttons for a simpler version
ESP32, ESP8266, or Arduino
LCD or OLED display
Buzzer
Breadboard and wires
What it teaches
Students learn counting, identification, data logging, and input handling.
Creative twist
Make it a “club entry counter” for a science club, reading club, or sports team. Students can assign each card a name such as Member 1, Member 2, and Member 3, without using real personal data.
How to choose the right board and tools
There is no single perfect board for every project. The best choice depends on what the school or home already has.
Board or tool | Why it works well | Good project match |
micro:bit | Beginner-friendly and visual | Noise monitor, door alert, simple reminders |
Arduino Uno | Great for basic circuits | Street light, water level alert, plant reminder |
ESP8266 | Built-in Wi-Fi and low-cost options | IoT alerts and dashboards |
ESP32 | Wi-Fi, Bluetooth, and more pins | Weather station, air indicator, attendance model |
Breadboard kit | No soldering needed | Most beginner circuits |
For younger students, block-based coding tools can reduce frustration. For students ready for text coding, Arduino IDE or Python-based options can be introduced step by step.
How to make these projects more creative
A working circuit is only half the project. The best school projects also tell a story.
Students can improve their models by adding:
A problem statement in simple words
A labelled diagram
Sensor readings written in a notebook
A handmade model using cardboard or recycled material
A short explanation of how data moves from sensor to device
A test table showing what happened during trials
For example, a smart plant project can include three readings: dry soil, moist soil, and wet soil. A smart street light can include tests in bright light, dim light, and darkness. This helps students move from “it works” to “I understand why it works”.

Common mistakes to avoid
Small mistakes are part of learning, but a few can slow the project too much.
Avoid these common issues:
Starting with too many features
Build the basic version first. Add Wi-Fi alerts, displays, or dashboards later.
Skipping wiring checks
Many errors come from loose jumper wires or wrong pin connections.
Using water carelessly
Water projects need extra care. Keep the board and power source dry.
Copying code without understanding it
Students should be able to explain what each main part of the code does.
Forgetting the real-world problem
A project should answer a simple question: what problem does this solve?
A simple project planning template
Before building, students can fill this short plan:
Question | Example answer |
What problem will the project solve? | My plant dries out when I forget to water it. |
What will the sensor detect? | Soil moisture. |
What will the device do? | Turn on an LED when the soil is dry. |
How will I test it? | Try the sensor in dry, moist, and wet soil. |
How will I explain it? | Show the sensor, code logic, and test results. |
This planning step makes the final model stronger and easier to present.
Final takeaway
IoT is exciting for 5th to 7th grade students because it joins coding, electronics, science, and real life. The best starting projects are not the most complex ones. They are the ones students can build, test, explain, and improve.
Start with a smart plant reminder, weather station, noise monitor, or street light model. Keep the circuit safe, the goal clear, and the design creative. Once students see a sensor respond to the world around them, they begin to understand what connected technology can do, and they start imagining their own inventions.


Comments